We go through an obscene amount of plain Greek yogurt in my household. It’s such an easy, delicious, healthy and versatile snack. I’m still a dairy farm kid at heart, so it was only a matter of time before I started experimenting with making my own yogurt.
As I started this endeavor without any experience or clue about yogurt-making, I found a few recipes online and one in Bust Magazine and cobbled together an idea of what the process would look like in my West Philly rental set up. My old oven doesn’t have temperatures marked on it, so I use a likely inaccurate internal oven thermometer. I was concerned about the long warming process during which I had to keep the yogurt mixture at a steady 105 degrees, but despite my lack of experience and quality equipment, I ended up with a solid first batch of yogurt!
Turns out, making your own yogurt is quite simple. It requires only two ingredients: milk and a bit of plain starter yogurt with live and active cultures. The secrets to yogurt making are temperature and time.
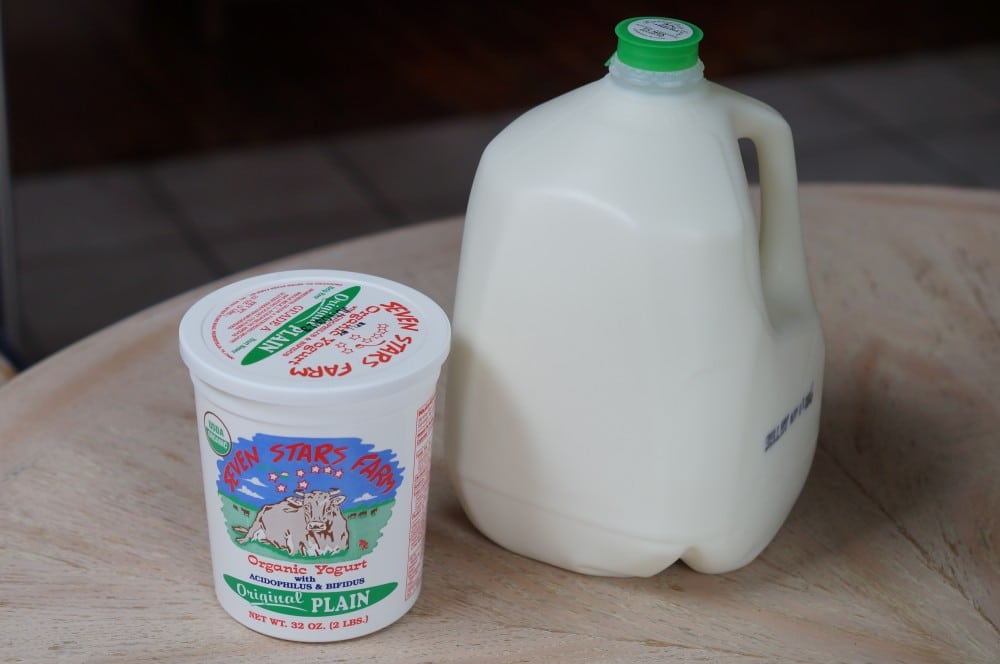
I started with Maplehofe Dairy milk and Seven Stars yogurt, both local ingredients, from my beloved Mariposa Food Co-op around the corner. Any milk and yogurt from a regular grocery store will do, but I wanted to start with local dairy products. I read that you can use any milkfat content, but whole milk will naturally produce a richer yogurt. I chose to start with 2% milk. When choosing the starter yogurt, be sure to find one with live and active cultures. I’ve also read that starting with Greek yogurt doesn’t work as well. The Beekman Boys claim there’s not enough liquid in it to keep the yogurt cultures alive. If you really want Greek yogurt, you can easily turn your homemade yogurt into the thicker Greek-style by straining it after it’s finished.
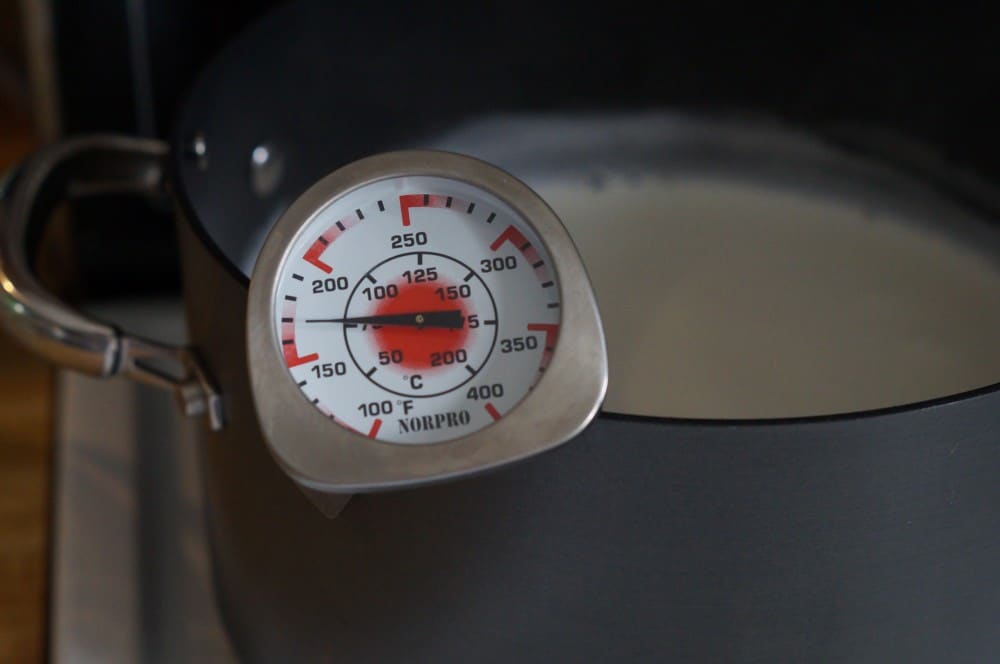
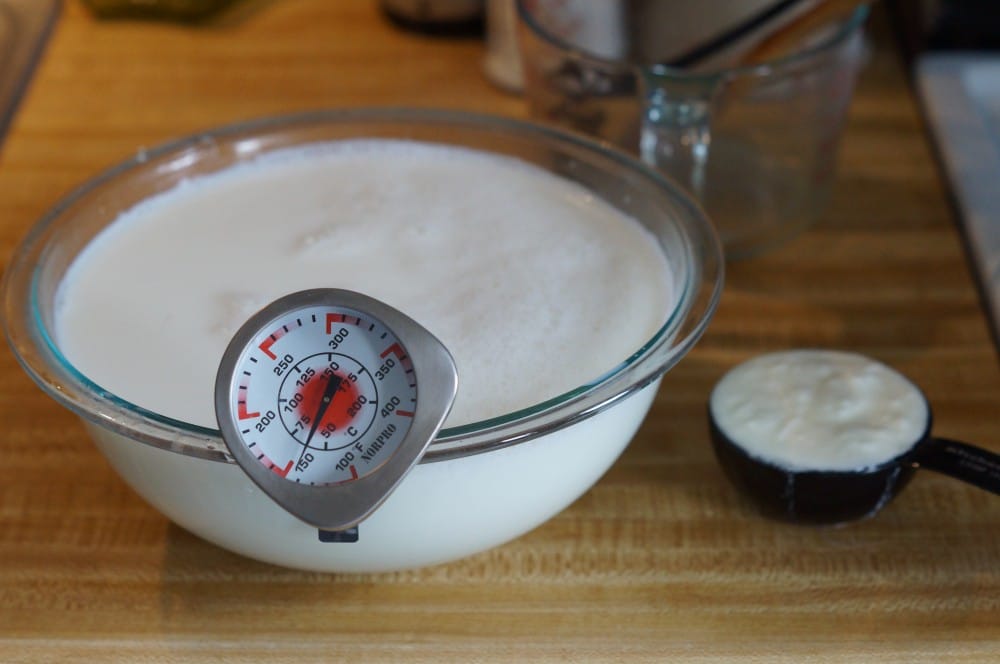
I started by pouring two quarts of milk into a pot and heating it slowly to 180 degrees. Stir it occasionally, especially as it inches toward 180, to prevent burning. After the milk has reached 180 degrees, remove it from the heat and let it cool to 110 to 115 degrees. This takes a little while. At this point, if the milk isn’t in an oven-safe container, transfer it into one. I used a large Pyrex mixing bowl. Once it’s at the target temperature, add a half cup of your starter yogurt and whisk until it’s combined with the warm milk. It’s really important that the milk is not warmer than 115 degrees or the cultures from the yogurt will die. If the milk is cooler than 105 degrees, it won’t be warm enough to activate those cultures.
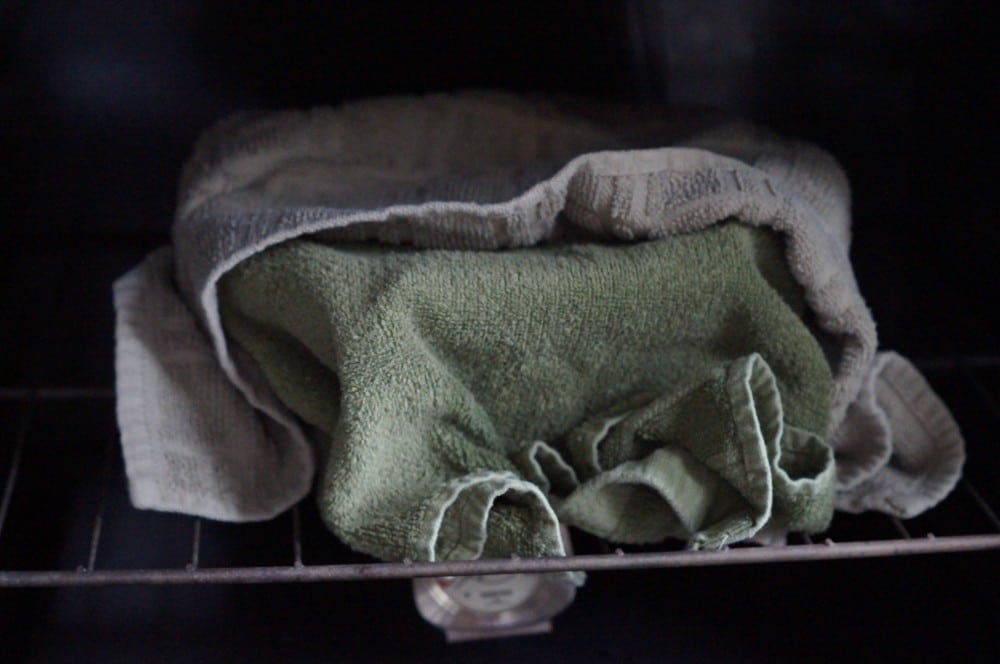
I covered my bowl of pre-yogurt with aluminum foil and wrapped it in dish towels to keep it nice and cozy just in case my oven was as unreliable as I expected. Since my oven is so inaccurate, I preheated it to get the gas lit, and then turned it off. If you can, heat your oven to 105 degrees. If your oven doesn’t go that low, you can preheat it for a bit, then just turn the oven off and leave the light on to generate and maintain a little extra heat. Let the yogurt incubate like this for anywhere from 8 to 15 hours. I left mine in the oven for about 10 hours.
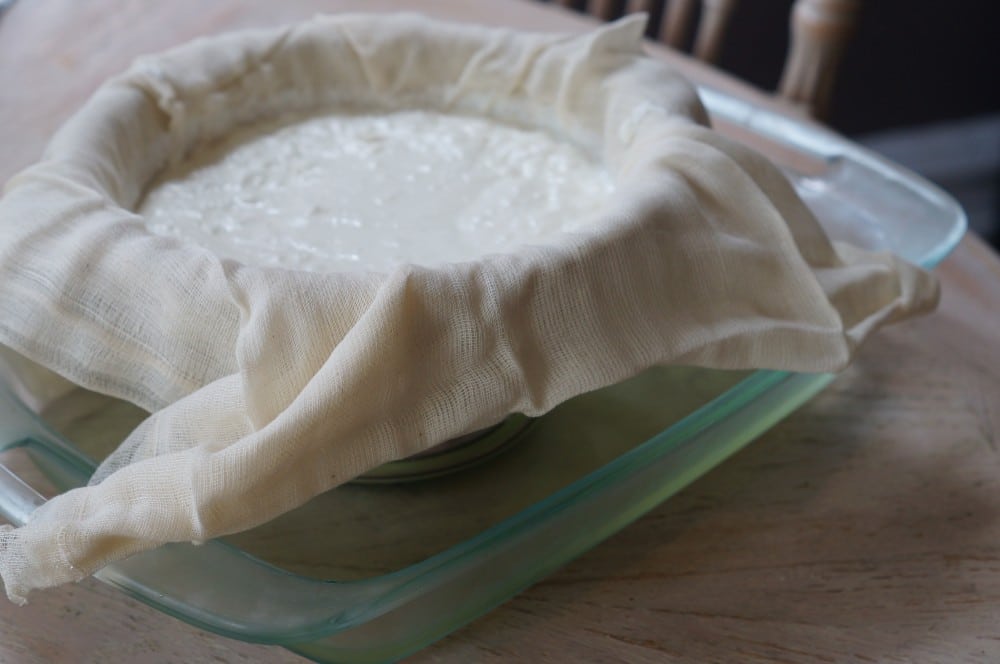
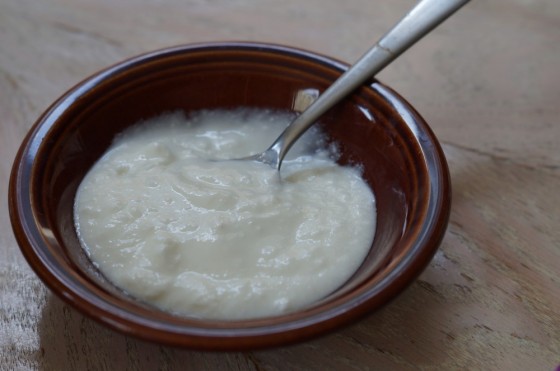
I chilled the bowl for a few hours, and I had delicious homemade yogurt! I wanted Greek yogurt, so I spooned it into a colander lined with layers of cheesecloth, and put the whole thing in a 9×12 Pyrex dish and let it drain in the refrigerator. My yogurt turned out a little more tart than I prefer, so next time I won’t leave it in the oven so long. I read that shorter incubation periods produce a milder flavor and longer periods make the yogurt more tart. This is something I’ll experiment with as I continue.
If yogurt making is for you, there are also electric yogurt incubators you can buy that will keep your yogurt at the proper temperature. You can keep some of your first batch to use as your starter yogurt for you next batch. It’s a healthy and delicious gift that keeps on giving!
- Photography: Lisa Yoder